cse15l-lab-reports
TUTORIAL: HOW TO LOG INTO A COURSE-SPECIFIC ACCOUNT
In this tutorial, we will be using the ieng6 server.
This is also a walkthrough of what I have done in this week’s lab.
Step 1. Install Visual Studio Code
Note: This is an important step as having VSCode installed will make it easier for us to see what is going on as we write our webpage. In VSCode, we are able to see the outcome of whatever we are writing (left-hand side) on the right-hand size; like a split screen. We can identify any mistakes early on by having an image of what we are writing.
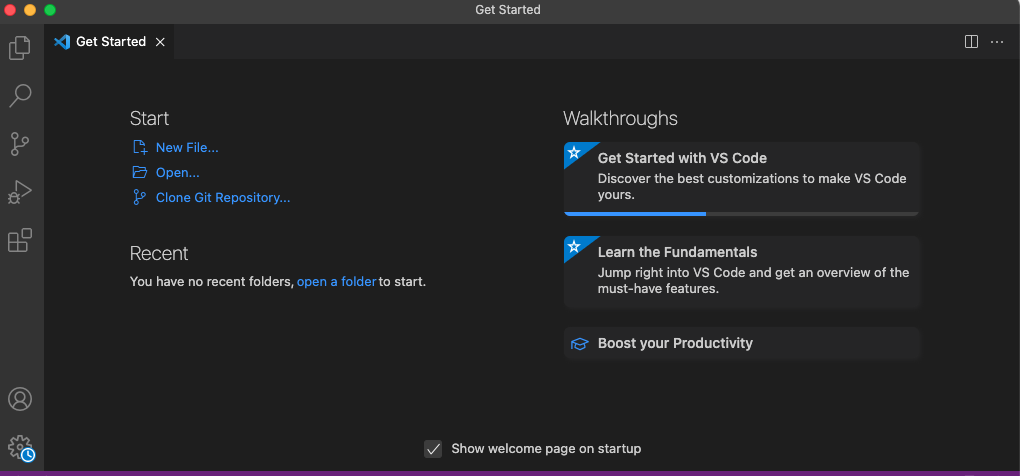
To download VSCode, navigate to the Official VSCode Website. Follow the instructions for a successful download. Once downloaded, your screen should look like this once you launch the application:
Step 2. Remotely Connecting to Another Server
- First, Install OpenSSH. Your pc might already have the OpenSSH Client, but not the OpenSSH Server (which was what happened in my case). Make sure both are installed.
- When those two are installed, follow the intructions on the website for the rest of the commands in order to ensure functionality.
- Then, launch VSCode, and open up a new terminal. Type out
$ ssh cs15lfa22<>@ieng6.ucsd.edu. You shouldn’t write the<>in there, it is just a placeholder–you need to know what your CSE15L account is for this step. (Note: Your course-specific account can be found here).
 - Before connecting, you will get a message asking if you want to keep connecting. Type ‘yes.’
- Once successfully connected, you will see the following in your terminal:
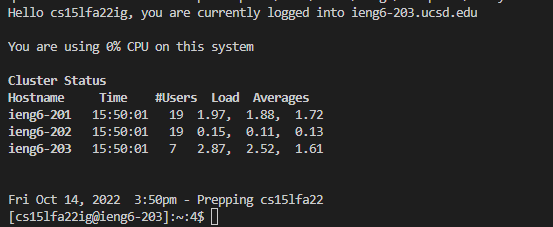
Congratulations! You have successfully connected to a remote server! :)
Step 3. Trying out Commands
In this part, we will be trying out some commands on our newly connected account.
- Let’s start using the
ls -latcommand: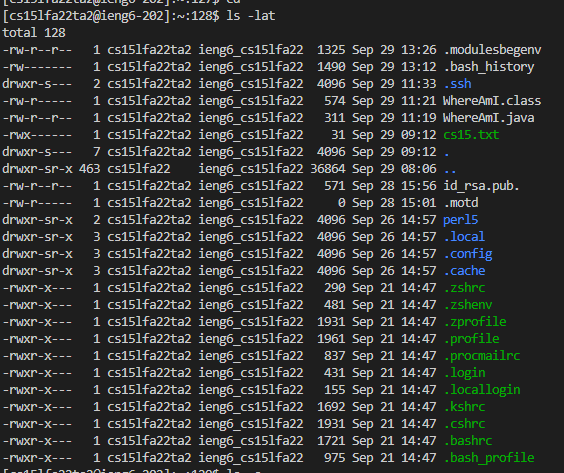 What this command will do is basically show a list of all directories, and existing files, sorted by when they were created.
 - For the next commaned, let’s try
ls -a, which will also show all files, without any timestamps or dates: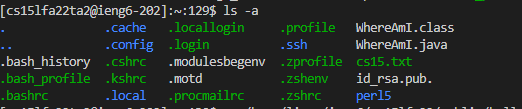
-
Finally, running the
cat /home/linux/ieng6/cs15lfa22/public/hello.txtcommand will print out the contents of the hello.txt file:
which is a small welcome to the course!
Now you know how to run commands on a remote server! :D
Step 4. Moving Files with the scp Command
- Create a java file on on your computer called
WhereAmI.java, with the following contents:class WhereAmI { public static void main(String[] args) { System.out.println(System.getProperty("os.name")); System.out.println(System.getProperty("user.name")); System.out.println(System.getProperty("user.home")); System.out.println(System.getProperty("user.dir")); } } -
Before compiling and running the file, type
exitonto the terminal to exit the remote account.
- Next, compile and run the file using the
javacandjavacommands.
- As you can see, running this file on my computer will only print out facts about my computer: the OS, which is Windows 11, and the user’s name, which is my name, Viann, but it doesn’t print out the rest of the information.
- Now, let’s run the
scpcommand in order to copy the file, as shown below:scp WhereAmI.java cs15lfa22zz@ieng6.ucsd.edu:~/
Note: The scp command stands for “Secure Copy Protocol,” and it does just that: securely copies a file from one host to the other, remotely.
- Upon completion, we run the
sshcommand, which will ensure a safe file transfer to our remote account: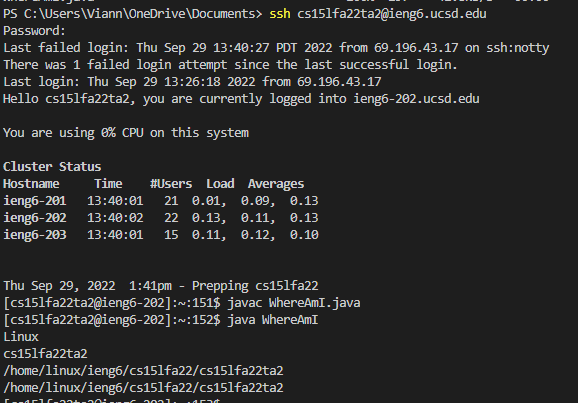
- As we can see, upon using the
sshcommand and we compile and run theWhereAmI.javafile, we will get more information about our current remote account, as running these commands has printed out the OS, the name of the account, and even the directory of that account.
- As we can see, upon using the
We just successfully copied a file from one computer to another remotely! :D
Step 5: Using an SSH key
- For this part, we will be generating something that is called an
sshkey. More specifically, the command isssh-keygen. We will be using this very useful command in order to diminish the time it takes for us to completely log in remotely and when usingscp, as we repeatedly have to be typing in our password everytime. - What
ssh-keygenwill do is fairly simple: it creates a pair of files, the “public key” and the “private key,” and then the public key is copied to a particular location on the server, while the private key gets copied to a particular location on the client. After this, using thesshcommand with this key already in place will allow us to use those files (the public and private keys) instead of our password. - In order to set this up, you should type the following command on your computer/terminal:
$ ssh-keygen
Which should bring up something like this afterwards:

- Following this, another message will pop up, which wil ask you for which file you want to save the key in. Just press enter, as we are specifying the default path, which should be something like this (/Users/your name/.ssh/id_rsa).
- It will then ask you for a “paraphrase.” You can go ahead and type one in, but if you don’t want any, then just press enter to leave it empty.
- If successful, your terminal should look something like this:
PS C:\Users\Viann\OneDrive\Documents\GitHub\cse15l-lab-reports> ssh-keygen
Generating public/private rsa key pair.
Enter file in which to save the key (C:\Users\Viann/.ssh/id_rsa):
Enter passphrase (empty for no passphrase):
Enter same passphrase again:
Your identification has been saved in C:\Users\Viann/.ssh/id_rsa.
Your public key has been saved in C:\Users\Viann/.ssh/id_rsa.pub.
The key fingerprint is:
SHA256:YGLAwtiIYQWR6me7yce/Q4tLLR8HLUGkjO9gk1ieOsY viann@DESKTOP-LCQR4P1
The key's randomart image is:
+---[RSA 3072]----+
|=O*.  .o         |
|*oo.o o          |
|.. oooo.         |
|. +.+o .o        |
|.. B . oS.       |
|..oo+ ..o        |
| Eo o+oo..       |
|. o.o+ooo        |
|   +o.o+o        |
+----[SHA256]-----+
- This has created two files on our system: the private key, which is in the file
id_rsa, and the public key, which is in the fileid_rsa.pub, all stored in the.sshdirectory on our computer. - Now, we need to copy the public key to the
.sshdirectory of our user account on the server. To do this, write out the following in your terminal:
# on your client
$ ssh cs15lfa22<>@ieng6.ucsd.edu

(type out your password)
Note: the <> is a placeholder for the last two letters on your account.
- Then, while being in the server,
# now on the server

$ scp /Users/your name/.ssh/id_rsa.pub cs15lfa22@ieng6.ucsd.edu:~/.ssh/authorized_keys

(Note: use your username and the path you saw from the command above)
-
Once you do this, you should be able to
sshorscpfrom this client to the server without entering your password. -
Note: I will not be showing my screenshots for this part since I unfortunately couldn’t get this to work for some reason, as I kept getting asked for my password when doing the
scppart, and everytime I typed it out, it kept prompting me to keep inputing it.
Step 6: Attempting for Remote Running to be even More Pleasant
- In this step, we will be attempting to come up with a stress-free process for making a local edit to the file we created previously,
WhereAmI.java, copying it to the remote server, and running it. - Here are a few hints:
1) You are able to write a command in quotes at the end of an
sshcommand to directly run it on the remote server, and then exit. As an example, running this command will list the home directory on the remote server:$ ssh cs15fa22@ieng6.ucsd.edu "ls" - Additionally, you are able to use semicolons to run multiple commands on the same line:
$ scp WhereAmI.java OtherMain.java; javac OtherMain.java; java WhereAmI
Please note: as mentioned previously, I was unable to get my ssh part working from the previous step, which also prevented me from completing this step.